Search Google

Custom Search

Search Results

Sunday, July 26, 2009

MORE FREE AMIGURUMI PATTERNS TO LOVE!

It seems I am as addicted to reading all about amigurumi and searching for free patterns as I am to actually crocheting the delightful little critters! In my quest to find the absolute cutest free patterns, you know...the ones that make you say "omg, I have to make that!!" I spend hours upon hours combing websites and blogs looking for them. I ran across a few adorable ones that I have put on my "Amigurumi to Crochet" list which will take me until I'm at least 80 years old to finish. Today I ran across these "Funky Pigs" at the Premier Yarns website. Get the free pattern here.

The Funky Pigs – Flora, Dottie and Lionel
Designs by Michele Wilcox

I think they are just too cute and huggable, and I love the way they all have different, yet matching outfits. And speaking of toooo cute, look at this little amigurumi lamb:

This little guy is a definate future project for me. I found the pattern for him here:
Something about those little eyes! I was able to find some of these glass eyes at my local Hobby Lobby. I think they are beautiful and I can't wait to use them in a project.
If you're unable to find them at your local craft store, you can also order them here: http://www.suncatchereyes.net/
And while you're there check out their section of free patterns! They have some very cute ones. Take a look at a few of them:


Very nice!

Well, time for me to grab hook & yarn and get my daily dose of crochet fun!
As always, thanks for visiting. And until next time....happy hooking!


Stumble Upon Toolbar

Thursday, July 23, 2009

Amigurumi Koala!


I've finished another amigurumi project and I couldn't be happier with the results. This little koala (I named him "Kikoo") was super fast, easy & fun! He turned out even cuter than I thought he would! In case you'd like to make one yourself, you can find the pattern here:

Stumble Upon Toolbar

Monday, July 20, 2009

CROCHET CUTIES!!

My amigurumi crocheted critters collection is growing by the day! Take a look at these little ones I was able to whip up over the weekend!

I'm including the free patterns because I know many of you will fall in love with these little cuties like I did!!
My bunny is finally finished (she was my 2nd project) and I think she is very sweet! I got the pattern for her here:
http://www.lionbrand.com/patterns/60480A.html

My safety lock eyes had not arrived in the mail yet, so I crocheted her eyes on, as well as giving her an embroidered mouth.

I've found that each project seems to get a little easier. The hardest part of amigurumi crochet in my opinion, is trying to figure out what to crochet next! They are all just so adorable. Not to mention quick and easy to complete!

When I finished the bunny

I started on my little turtle,
"Sheldon" as I call him.
(Yes I'm naming them now.
I'm getting very attached to the little guys!)
The pattern for the Turtle can be found here:
http://www.womansday.com/Articles/Crafts/Crocheting/Cuddly-Crochet-Creatures-Turtle.html


There aren't any assembly instructions on the pattern site, however I was able to assemble him without too much trouble by looking at the photo on the pattern.
Here's another picture so you can judge his size:

CUTE!!!

I'm off to cook dinner, then settle myself with yarn and hook in front of the t.v. to spend a relaxing evening creating!

Until next time....happy hooking!


Stumble Upon Toolbar

Thursday, July 16, 2009

Amigurumi Tips & Tricks

As I do more of this Amigurumi crochet I'm finding that there are a few "tweeks" that need to be done that are different from just your everyday crochet. The first thing I found out (the hard way, lol) is that Amigurumi crochet stitches must be pulled very, very tight! Why is this so important? Well, the biggest reason is that Amigurumi stuffed toys are stuffed extremely full. If your stitches are not as tight as you can possibly get them the stuffing will show thru. Especially if your yarn is a dark color. I found this out with my first project, pictured below, the lady bug. Her head is black, which is in my opinion the most unforgiving color when you're using white polyfill stuffing! I could see the white peeking thru and it was very noticeable! Drove me crazy in fact. So tip #1, pull your stitches TIGHT! It's a little harder when you're crocheting the piece, but well worth it if you want a professional looking and beautiful finished piece!
My first Amigurumi Project!


And speaking of stuffing the amigurumi creation, tip #2 is that you will need to stuff and stuff the piece. And when you think you can't possibly fit any more stuffing, stuff it some more! This makes for a firm, evenly proportioned piece that will hold the shape whether sitting or standing up. Now there are some patterns that will instruct you to stuff the piece lightly....for example my bunny tail, and in those cases you'll want to follow the pattern instructions. Any other time..stuff, stuff and stuff some more!

The 3rd tip is to start your piece using a " Magic Adjustable Ring". This will give you a very small, almost non-existent hole in the beginning of your piece. Being sceptical if this would really make that big of a difference, I tried starting my piece both ways and found that it makes a huge difference! The "magic adjustable ring" is not that hard to master and with a little practice it's even easier than the traditional way of starting a crochet "circle". Here is a link for those that don't know how to create the magic adjustable ring : http://www.crochetme.com/Dec_Jan_0405/reads_round.html It's well worth taking the time to master this handy little technique!

I'm sure I'll be discovering more tips since I'm kinda learning Amigurumi crochet as I go!
Does anyone have any tips to add?


Stumble Upon Toolbar

Wednesday, July 15, 2009

My New Camera


I went to bed with such a sense of accomplishment last night because I nearly finished another (my 2nd) amigurumi project. This time a floppy eared bunny! I wished so much that I had a digital camera so I could post 'in progress' pictures of him/her. I tried with my cell phone camera...at least 7 pictures which were either too blurry, too small, too dark or too light. This morning I got up and headed straight to Walmart and got a camera (cheap but sufficient)....and it's PINK even! So I spent the whole afternoon figuring it out and taking pictures of everything from my long haired Chihuahua's..... (Allie
& Shortie) aka My Girl's!!

My Bed......... my wrought iron Corset..& my "Wallies" (which I am addicted to BTW!)

and needless to say I got nothing done on my little amigurumi bunny =(
He/she is laying in pieces waiting to be assembled. But it was fun and now I'll be able to post pictures when I do finish "it".

I did manage to find some more free patterns to add to my "To Do" list and thought I would share :)

This little bee is so cute!

Crochet Baby Bee
Designed by Michele Wilcox.

Bee measures 6” tall.
RED HEART® “Super Saver®”: 1 Skein each 324 Bright
Yellow A, 312 Black B, and 311 White C.
Crochet Hook: 3.75mm [US F-5].
Split-lock stitch marker; yarn needle, stuffing; 2 small black
dome buttons; small amount red Pearl cotton.
GAUGE: 16 sc = 4”; 20 rnds = 4” in sc. CHECK YOUR
GAUGE. Use any size hook to obtain the gauge.
SPECIAL ABBREVIATIONS:
inc (increase) = 2 sc in next sc.
dec (decrease) = draw up a loop in each of next 2 sc, yarn
over and draw through all 3 loops on hook.
NOTE: Work in continuous rounds of sc without joining
unless otherwise indicated. Place a marker in first stitch of
round and move up each round.

HEAD AND BODY: Begin at top of head with A, ch 2.
Rnd 1: 6 sc in 2nd ch from hook.
Rnd 2: 2 Sc in each sc around – 12 sc.
Rnd 3: [Sc in next sc, 2 sc in next sc] 6 times – 18 sc.
Rnd 4: [Sc in next 2 sc, 2 sc in next sc] 6 times – 24 sc.
Rnd 5: [Sc in next 3 sc, 2 sc in next sc] 6times – 30 sc.
Rnds 6-12: Sc in each sc around.
Rnd 13: [Dec] 15 times – 15 sc.
Neck-Rnd 14: [Sc in next 3 sc, dec] 3 times – 12 sc.
Body-Rnd 15: [Inc] 12 times – 24 sc.
Rnds 16 and 17: Sc in each sc around. Cut A. Stuff Head.
Rnds 18-21: With B, sc in each sc around. Cut B.
Rnds 22-24: With A, sc in each sc around.
Rnd 25: Dec] 12 times – 12 sc.
Rnd 26: [Dec] 6 times – 6 sc. Fasten off. Finish stuffing.
Weave yarn tail through remaining 6 sc, draw up firmly to
gather; fasten securely.

WING (Make 2): With C, ch 7.
Row 1: Sc in 2nd ch from hook and in next ch, hdc in next
2 ch, dc in next ch, 6 dc in last ch; working on opposite
side of ch, dc in next ch, hdc in next 2 ch, sc in last 2 ch;
turn.
Row 2: Ch 1, sc in next 2 sts, hdc in next 2 sts, dc in next
st, 2 dc in each of next 6 sts, hdc in next 2 sts, sc in last 2
sts; turn.
Row 3: Ch 1, slip st in each st around. Fasten off.
Sew in place on back of bee.

LEG (Make 6): With B, ch 7; 3 sc in 2nd ch from hook, slip
st in last 5 ch. Fasten off.
Sew in place.

FEELERS (Make 2): With B, ch 10; slip st in 2nd ch from
hook and in each ch across. Fasten off.

Sew in place.
Sew button eyes in place or embroider black French knot
eyes. Embroider red smile.


ABBREVIATIONS: A, B, C = color A, B, C; ch = chain;
dc = double crochet; hdc = half double crochet;
mm = millimeters; rnd = round; sc = single crochet;
st(s) = stitch (es); * = repeat whatever follows the * as
indicated; [ ] = work directions in brackets the number of
times specified.

I really love this little guy too!
Little Crochet Giraffe
Designed by Michele Wilcox.

Giraffe measures 8” tall.
RED HEART® “Super Saver®”: 1 Skein each
320 Cornmeal A, 321 Gold B, 256 Carrot C, 312 Black D.
Crochet Hook: 3.75mm [US F-5].
Split-lock stitch marker; yarn needle, stuffing; two 3/8”
buttons for eyes.
GAUGE: 16 sc = 4”; 20 rnds = 4” in sc. CHECK YOUR
GAUGE. Use any size hook to obtain the gauge.
SPECIAL ABBREVIATIONS:
inc (increase) = 2 sc in next sc.
dec (decrease) = draw up a loop in each of next 2 sc, yarn
over and draw through all 3 loops on hook.
NOTE: Work in continuous rounds of sc without joining
unless otherwise indicated. Place a marker in first stitch of
round and move up each round.

HEAD AND BODY: Begin at top of head with A, ch 2.
Rnd 1: 6 sc in 2nd ch from hook.
Rnd 2: 2 Sc in each sc around – 12 sc.
Rnd 3: [Sc in next sc, 2 sc in next sc] 6 times – 18 sc.
Rnd 4: [Sc in next 2 sc, 2 sc in next sc] 6 times – 24 sc.
Rnd 5: [Sc in next 3 sc, 2 sc in next sc] 6times – 30 sc.
Rnds 6-12: Sc in each sc around.
Rnd 13: [Dec] 15 times – 15 sc.

Neck-Rnd 14: [Sc in next 3 sc, dec] 3 times – 12 sc.
Rnd 15: Sc in each sc around. Stuff head.
Rnd 16: [Sc in next 5 sc, inc] twice – 14 sc.
Rnd 17: [Sc in next 6 sc, inc] twice – 16 sc.
Rnd 18: [Sc in next 7 sc, inc] twice – 18 sc.
Rnds 19 and 20: Sc in each sc around.
Body-Rnd 21: [Sc in next 2 sc, inc] 6 times – 24 sc.
Rnds 22-30: Sc in each sc around.
Rnd 31: [Dec] 12 times – 12 sc.
Rnd 32: [Dec] 6 times – 6 sc. Fasten off. Finish stuffing.
Weave yarn tail through remaining 6 sc, draw up firmly to
gather; fasten securely.

LEG (Make 4): With A, ch 2.
Rnd 1: 6 Sc in 2nd ch from hook.
Rnd 2: [Sc in next sc, inc] 3 times – 9 sc.
Rnds 3-10: Sc in each sc around. Fasten off.
Stuff. Sew in place.

HORN (Make 2): With C, ch 2.
Rnd 1: 6 Sc in 2nd ch from hook.
Rnd 2: [Sc in next 2 sc, inc] twice – 8 sc.
Rnd 3: Sc in each sc around.
Rnd 4: Working in back lps on this rnd only, [dec] 4 times
– 4 sc.
Rnd 5: Slip st in each sc around. Fasten off.
Do not stuff. Sew in place.

EAR (Make 2): With A, ch 2.
Row 1: 6 Sc in 2nd ch from hook; turn.
Row 2: Ch 1, [inc] 6 times; turn – 12 sc.
Row 3: Ch 1, sc in first 5 sc, [inc] twice, sc in last 5 sc – 14
sc. Fasten off.
Fold ear in half at ends of rows and sew in place.

SNOUT: With A, ch 2.
Rnd 1: 6 Sc in 2nd ch from hook.
Rnd 2: [Sc in next 2 sc, inc] twice – 8 sc.
Rnd 3: [Sc in next 3 sc, inc] twice – 10 sc.
Rnd 4: [Sc in next 4 sc, inc] twice – 12 sc. Fasten off.
Stuff lightly and sew in place. Embroider straight sts nose
and mouth with D. Sew eyes in place.


MANE: With C, ch 15.
Row 1: Sl st in 2nd ch from hook, slip st in next ch, [ch 3,
slip st in 2nd ch from hook and in next ch, slip st in next ch
of beginning ch] 12 times. Fasten off.
Sew to center back of head.

TAIL: With A, ch 7; slip st in 2nd ch from hook and in each
ch across. Fasten off.
End of Tail: With C, [ch 6, slip st in 6th ch from hook] 5
times. Fasten off.
Weave yarn tail through slip st section; draw up tightly to
gather; fasten securely. Sew to end of tail.

SPOTS (Make 10): With B, ch 2.
Rnd 1: 6 Sc in 2nd ch from hook; join with a slip st in first
sc. Fasten off.
Sew one spot on each side of face for cheeks. Scatter
remaining spots around front and back of body.

ABBREVIATIONS: A, B, etc. = color A, B, etc.; ch = chain;
mm = millimeters; rnd = round; sc = single crochet;
st(s) = stitch (es); * = repeat whatever follows the * as
indicated; [ ] = work directions in brackets the number of
times specified.

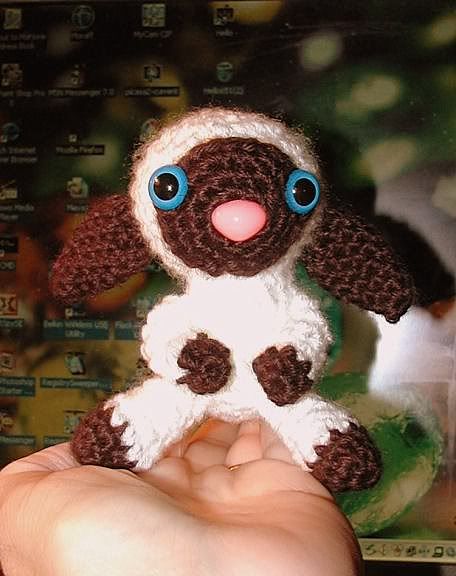
Well I'm off to work on my little bunny, hopefully I'll be posting pictures of him/her tomorrow all finished and adorable!

Until then...happy hooking!

Stumble Upon Toolbar

Tuesday, July 14, 2009

So just what IS "Amigurumi" Crochet anyway??

Welcome to my very first Blog! Why am I so nervous?? Well let me briefly introduce myself. I'm a mom, a grandmom and a recently "displaced" worker. Having been laid off from my job of 9 years only 2 weeks ago I've been forced into what I now have decided to call my "vacation". Hey, might as well make the most of it right? And it sounds so much better than being "unemployed". I haven't been "unemployed" for any length of time since I was 15 years old. So here I am. 49 years old, recently seperated from my husband of 26 years, and raising my 3 year old grandson, who has lately been my main motivation for anything and everything I do!! I've been doing alot of worrying and contemplating lately. Where do I go from here? I've tossed around all the ideas of taking advantage of my meager severance time and going back to school, doing some babysitting out of my home, calling everyone I know to put the word out that I'm looking for work and all the various "work from home" ideas. What I came up with is basically...nothing. I'm just more confused than I was before. So I called an old dear friend to cry on her shoulder, which she obliged and then proceeded to tell me about how busy she is getting ready for a craft show here in our town in October 2009. She has done these craft shows before and makes a nice little chunk of change to supplement her retirement income. "You should whip up some of your beautiful crochet and attend the craft fair with me this year! We could get a booth together even."


Now that was something to think about. I love to crochet. I taught myself when I was 14 years old and have been happily addicted ever since! I've crocheted everything from afghans, to potholders to sweaters & scarves. I love to create!! To me there is such a wonderful sense of accomplishment and pride to take a piece of string and turn it into something beautiful! "Okay" I told my friend. "That sounds fun and it will get me out of the house if nothing else." I might even make a little extra money if I'm lucky. I've got a little time before my severance pay runs out in 5 months so why not? The more I thought about it, the more I liked this idea of attending a craft show with my very own "products" made with my own two hands! My family and friends always say I should sell some of my crocheted work because I am so "talented". But I've never had the time or the energy to make a substantial amount of pieces....until now.

So, first things first, I thought. "What should I make?" Afghans, baby blankets and the like would take too long. I need to make something that's beautiful and can be done relatively quickly if I'm going to be ready by October! Then it hit me. I've seen pictures in crochet magazines and on crochet websites of these little tiny dolls, animals, bugs and just about everything you could imagine....even vegetables and food!


I have often thought of trying it for gift giving or toys for my grandson. That might be something I can do quickly enough to have a respectable "inventory" for my first craft fair. So I jumped on the computer and started searching for patterns of these tiny little creatures. I was astonished at how many there were and just how popular this delightful art form called "Amigurumi" Japanese crochet is.

Ami-gu-what???


What does that mean? I did a new search under "amigurumi"
and much to my delight I found hundreds upon hundreds of pictures and free patterns. The definition of "Amigurumi" is as follows: the Japanese art of knitting or crocheting small stuffed animals and anthropomorphic creatures. The word is derived from a combination of the Japanese words ami, meaning crocheted or knitted, and nuigurumi, meaning stuffed doll. Amigurumi are typically cute little animals ( bunnies, cats, dogs, turtles, bears, squirrels and so on), but can include artistic renderings, and inanimate objects endowed with anthropomorphic features.


Ah, I see. Well that looks fun, and easy even! I'll give it a try. My first pattern was a cute little Lady Bug I found here:
http://www.lionbrand.com/patterns/80016AD.html

Isn't she just toooo cute???!!! ♥♥♥♥

I grabbed hook and yarn and finished "Lorelai" in an afternoon! I was hooked. It was fun, easy and quick. And best of all adorable and sure to be a popular bazaar item. I couldn't wait to start my next project.

The blog was an after thought. I thought it might be fun to document this "journey" I'm about to begin from start to..well, wherever it leads!
I welcome any ideas or feedback and meeting some new friends along the way would be nice too!

Here's a link to a free pattern for some super cute turtles that would be good for anyone just beginning amigurumi crochet.
http://www.crochetville.org/forum/showthread.php?t=40998


It's less challenging than the lady bug (all those spots and legs!!!!) Try it out and let me know what you think!


Until next time.......happy hooking!!


:

Stumble Upon Toolbar
Related Posts with Thumbnails

My Favorites